Create Consistent AI Characters: From Image to Video - Ace+ & Wan
Create Consistent AI Characters: From Image to Video - Ace+ & Wan
Turn a single image into a character that stays consistent across multiple images and videos. This guide shows you how using three drag-and-drop workflows.
Consistent Characters with AcePlus & Wan
What You'll Need
- ComfyUI (either installed locally or using ThinkDiffusion's cloud version)
- Just one image of your character to start with
- These ready-to-use workflows (just drag and drop!)
Getting Started: Download workflows
Step 1: Turn Your Image into a Character Sheet
Take a single image and create a reference sheet with multiple angles.
Step 2: Create Character Variations with Ace+
Generate consistent variations of your character while maintaining their core identity.
Step 3: Bring Your Character to Life with Wan 2.1
Transform your character images into fluid videos!
Just drag and drop the workflows, add input images & prompts, and run! [These are ready to run workflows where that will work end to end]
Setup Instructions (One-Time Only)
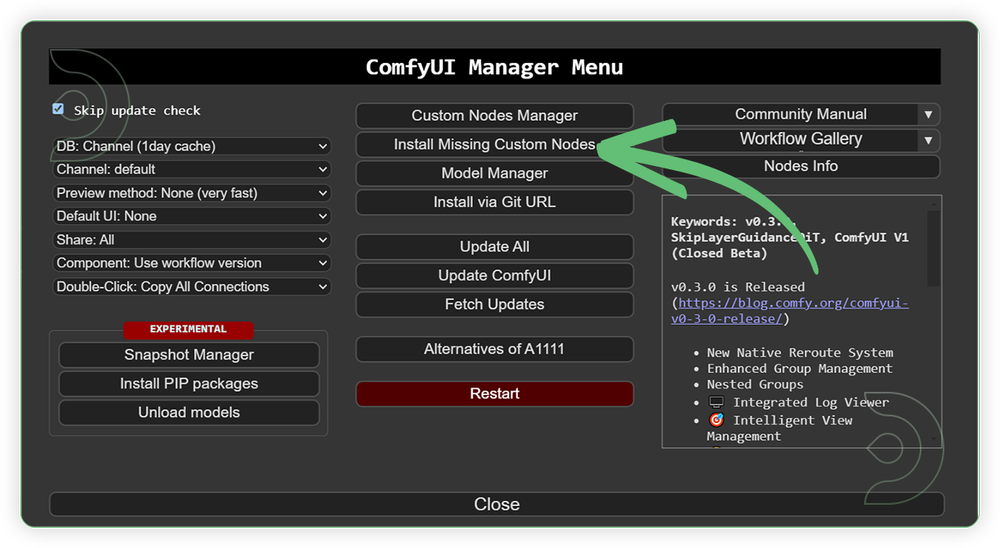
Installing Missing Custom Nodes
If you see red nodes in your workflow:
- Look for the ComfyUI Manager in the menu bar
- Click "Install Missing Custom Nodes"
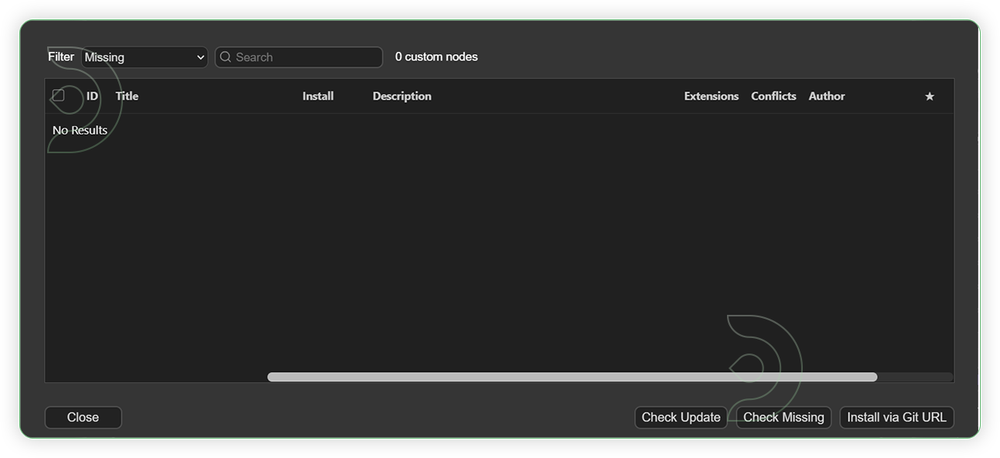
- When the list appears, click "Install"
- Wait for installation to complete
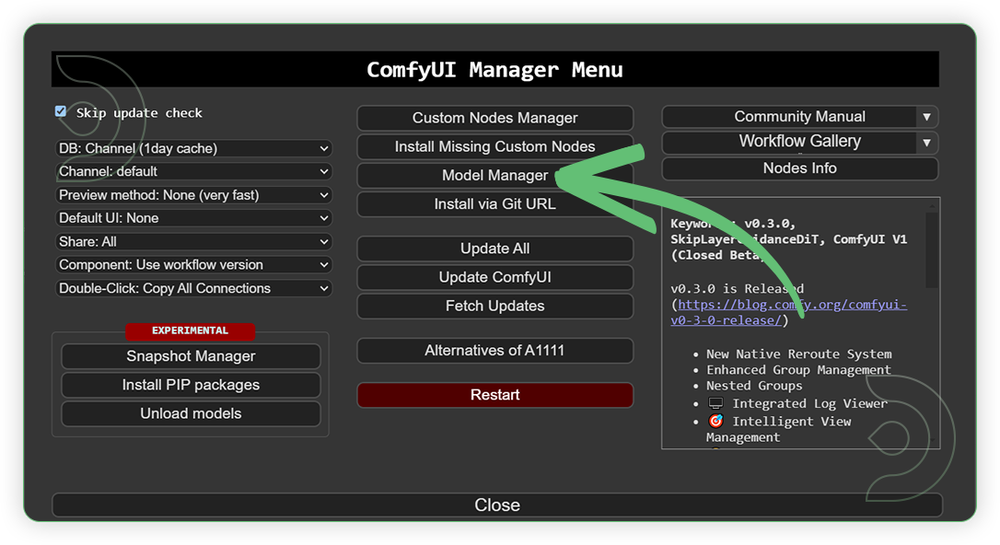
👉🏼 Launch ComfyUI in Local or ThinkDiffusion machines.
👉🏼 Install all Custom Nodes: If you see red nodes in your workflow, it means you're missing some required custom nodes. Follow these steps to install them so your workflow can function properly.
- Go to ComfyUI Manager > Click Install Missing Custom Nodes
- Check the list below if there's a list of custom nodes that needs to be installed and click the install.
👉🏼 Install Models:
- Go to ComfyUI Manager > Click Model Manager and install models that are selected on the workflow, in case it doesn't run.
Step 1: Image to Character Sheet
Generate a character sheet with multiple angles from a single input image as reference.
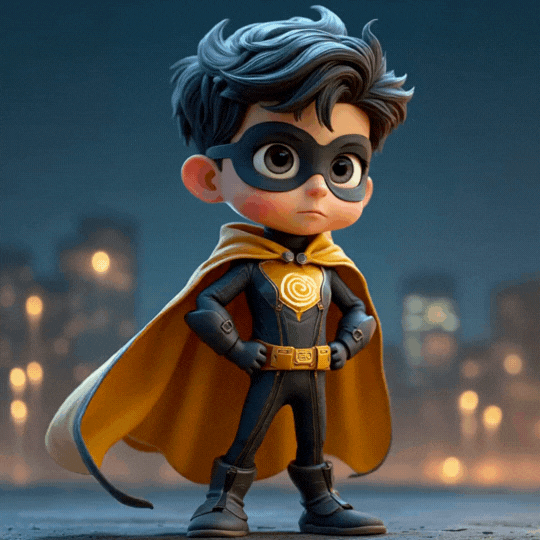
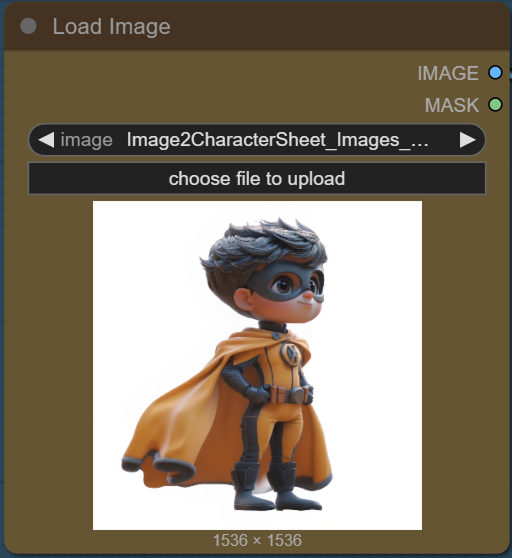
Image reference: Use any JPG or PNG showing your subject clearly. If you're trying to create a full body output, a full body input must be provided.
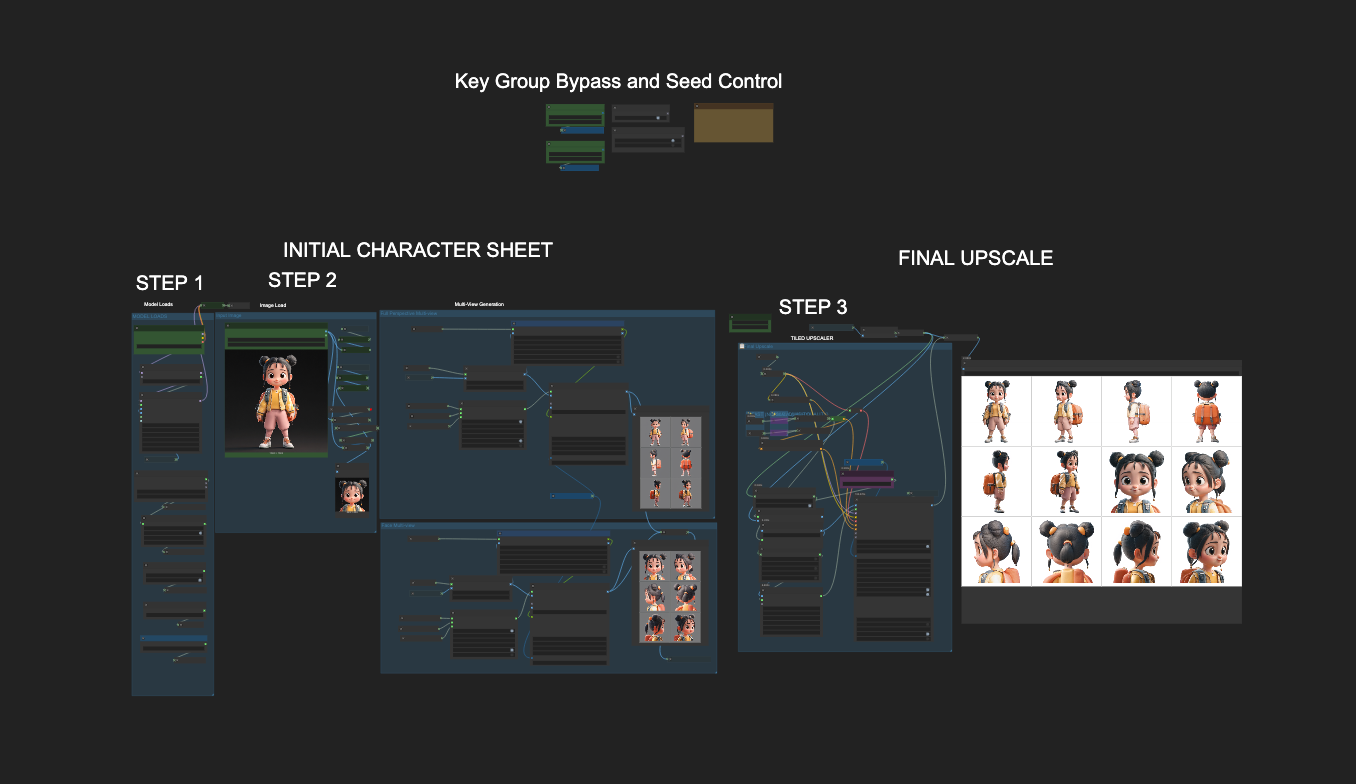
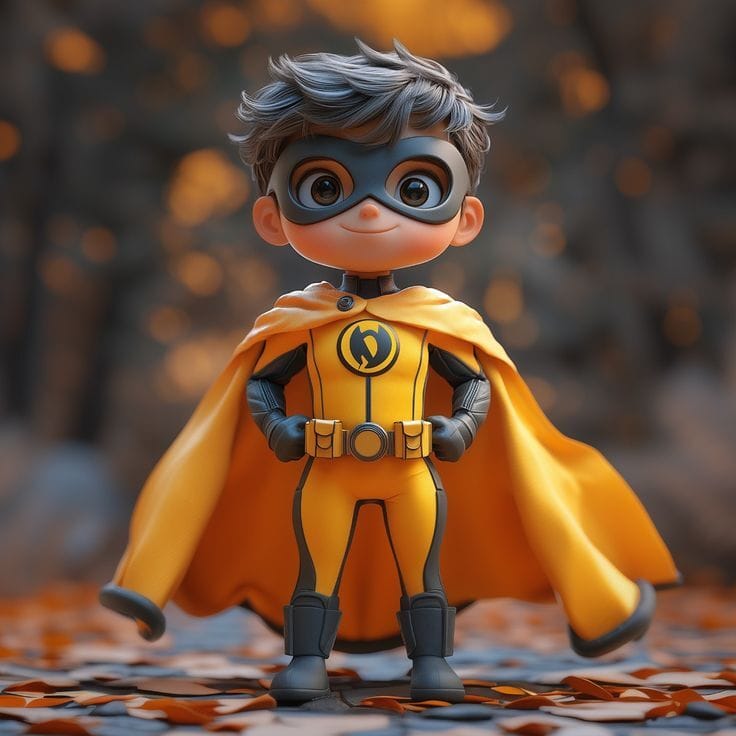
Input Image we used:
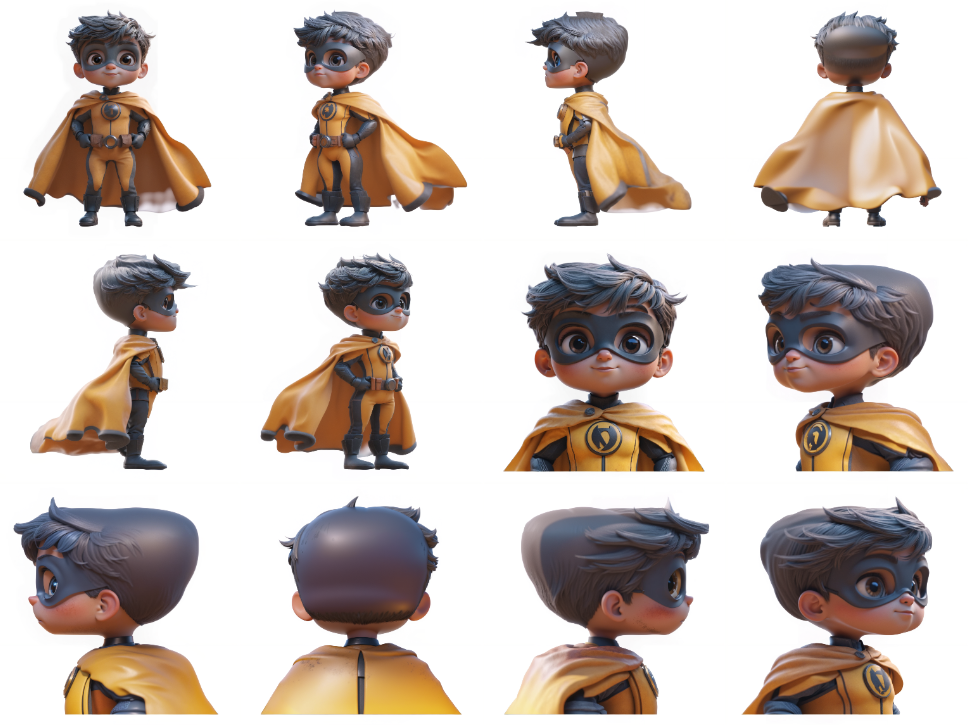
Character sheet output:
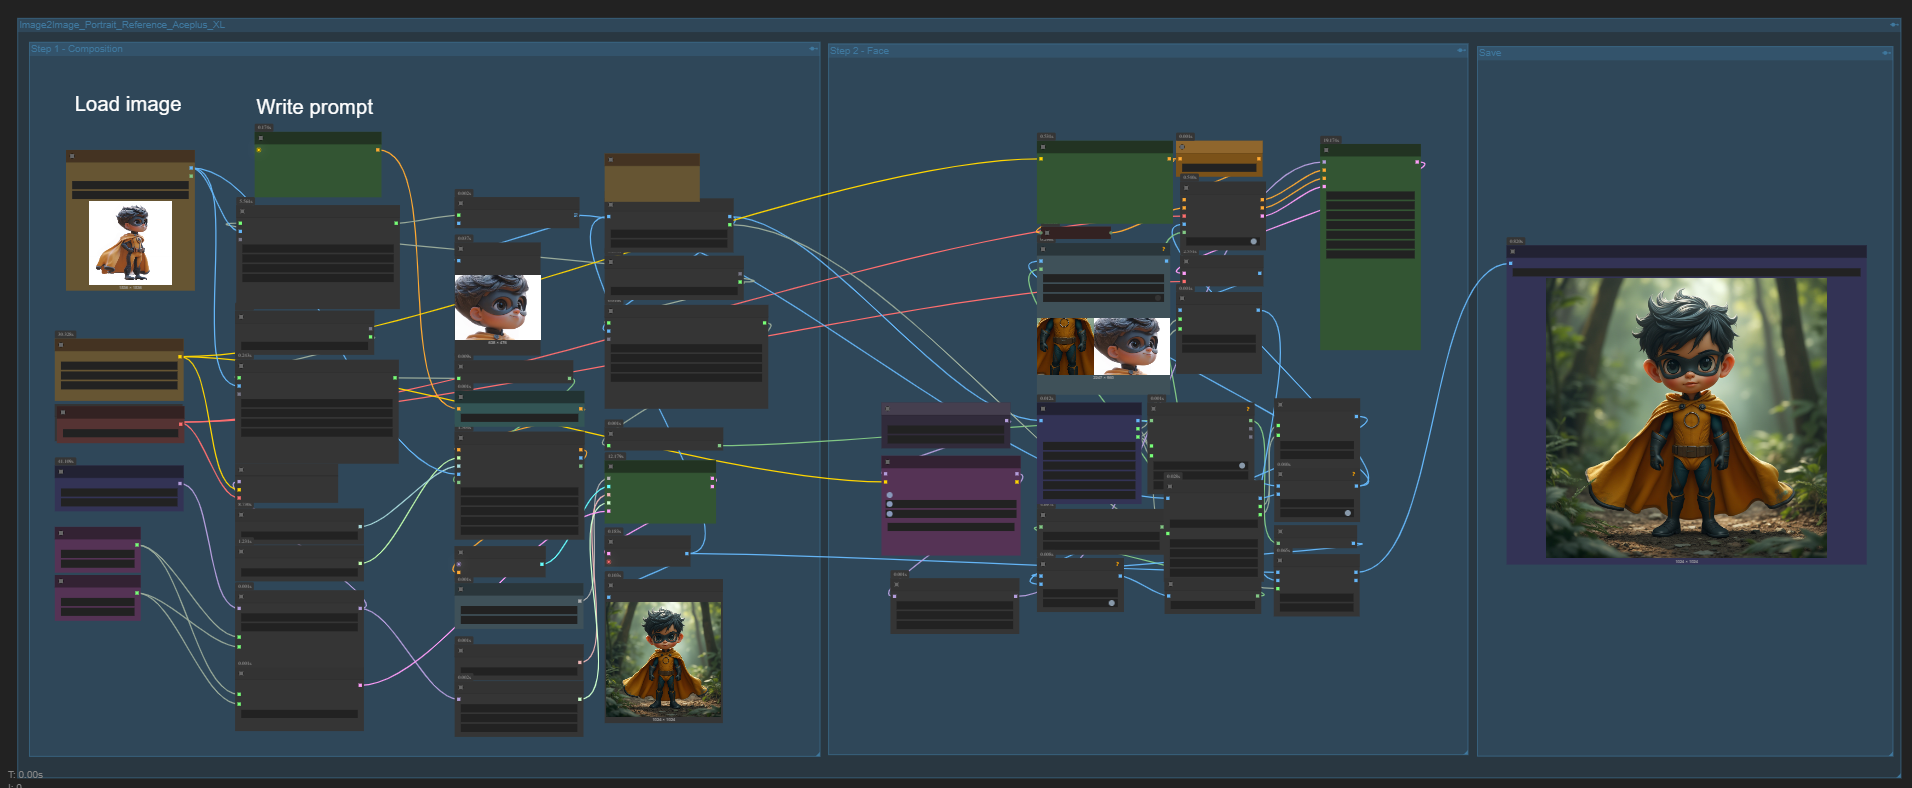
Step 2: Create character variations with Ace+
Create consistent image variations of your character / source image for model training and exploration.
Inputs we gave:
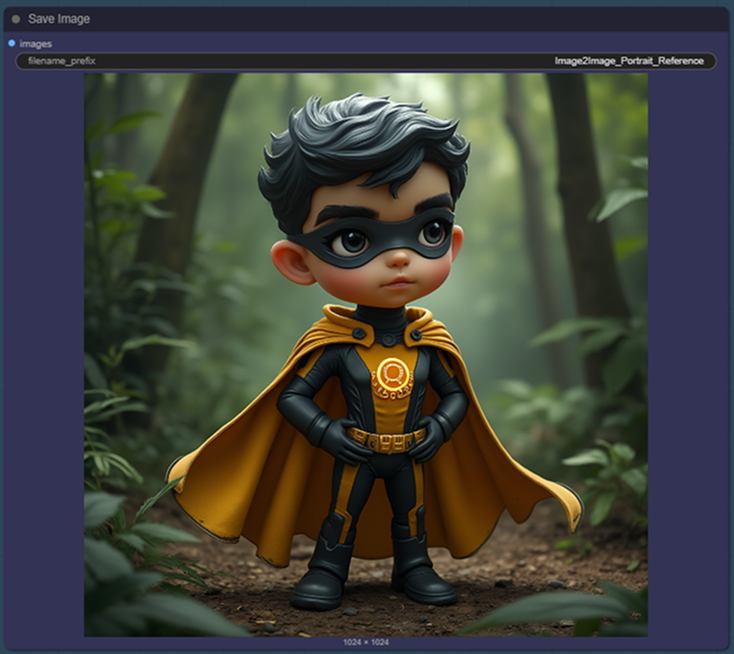
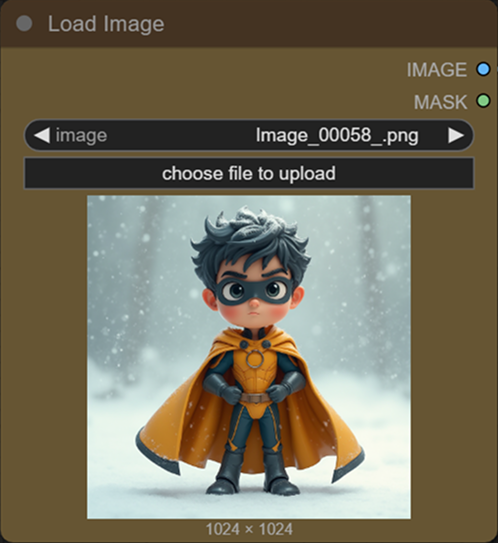
Outputs were variations of the same character that we tested:
Step 3: Wan workflow for generating videos
Wan is the best open source model right now. The character variations lead to interesting videos here.
Just drag and drop the workflow, add input images & prompts, and run!
Outputs:
Troubleshooting Tips
- If a workflow doesn't run, check for red nodes and install missing custom nodes
- For best results, use clear images with good lighting
- Start with simple prompts and gradually get more creative
- Try regenerating if the first result isn't quite right
Next Steps
Once you're comfortable with these workflows, try:
- Combining different characters in one video
- Adding specific backgrounds or environments
- Creating longer animation sequences
Need help? Join the ThinkDiffusion Discord community for support!